Leave Your Message

7 Tips for Buying Wood Frame Windows

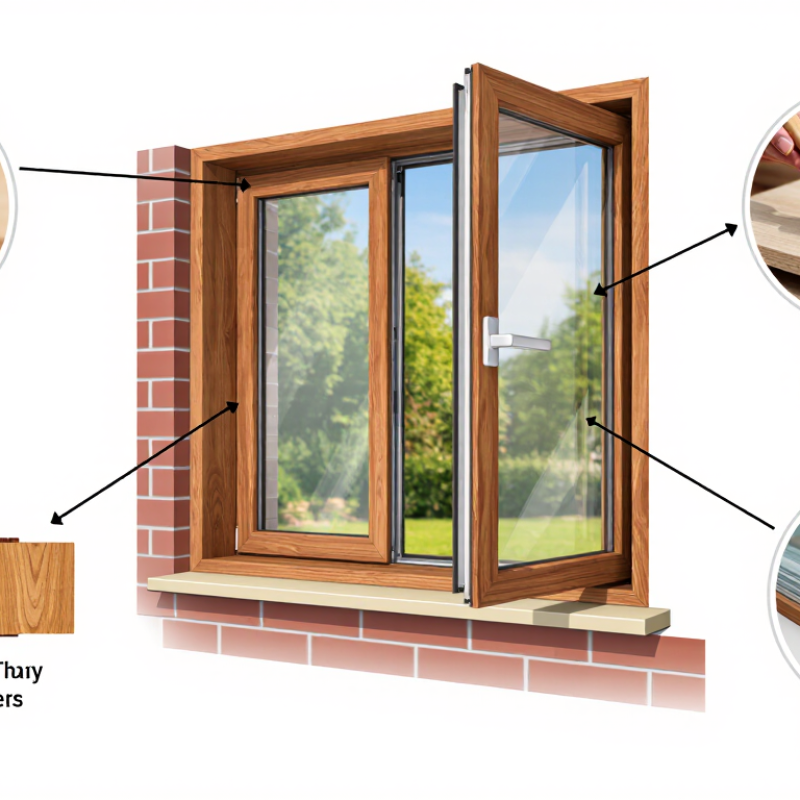
Choosing Wood Frame Windows involves more than matching a beautiful style to your home. The frame affects insulation, durability, maintenance, ventilation, and long-term comfort. A warm oak finish may look perfect beside a brick wall, yet poor installation can cause drafts around the sash. Small details matter.

This guide presents seven practical tips for making a more informed purchase. It considers timber species, glazing options, energy performance, finishes, hardware, installation quality, and expected maintenance. Reliable product labels and manufacturer specifications should support your decision. Local climate also matters. Humid coastal air, harsh winters, and strong sunlight can affect wood differently.

Look closely. Ask better questions.

A trustworthy supplier should explain the window’s construction, warranty limits, moisture protection, and repair process. Independent energy ratings can help compare products, but they should not replace professional advice for unusual openings or older buildings. Measure twice, and confirm the final dimensions before ordering. That sounds obvious. It is not always followed.

The most expensive window is not automatically the best one. A cheaper frame may demand frequent repainting, while a premium option may offer stronger coatings and better seals. However, marketing claims can be vague. Read the technical information carefully, and request written details when something seems unclear. These tips will help you balance appearance, performance, budget, and the honest work required to keep Wood Frame Windows looking and functioning well.
7 Tips for Buying Wood Frame Windows

Define Climate, Style, Budget, and Maintenance Priorities Before Shopping

7 Tips for Buying Wood Frame Windows

Define Climate, Style, Budget, and Maintenance Priorities Before Shopping

Climate Comes First

Start with your climate, not the showroom display. In wet regions, wood frames need durable exterior protection and careful drainage. In dry, sunny areas, strong ultraviolet exposure can fade finishes and open small joints. Check seasonal humidity, wind, and temperature changes before comparing window designs. A qualified window professional can also explain local insulation requirements and installation practices.

Match the Style to the Building

Style matters, but it should support the building. Look at your rooflines, wall colors, and interior trim. A narrow frame may preserve an older home’s proportions, while wider glass can brighten a dark hallway. Take photographs at different times of day. Colors can look surprisingly different. I once chose a warm finish from a small sample, yet it appeared too orange across a whole room.

Plan the Complete Budget

Set the complete budget before shopping. Include delivery, removal, flashing, finishing, and professional installation. A lower purchase price may become expensive after repeated painting or difficult repairs. Ask how often the exterior coating needs attention, and whether damaged sections can be restored.

Be Honest About Maintenance

Maintenance preferences deserve honest attention. Will you inspect joints every year? Will ladders be practical? I prefer realistic care plans over perfect-looking promises. Wood frames reward attention, but neglected moisture can quietly damage surrounding walls. Get written performance details, warranty terms, and maintenance instructions before signing anything.
Measure the Opening and Select the Correct Installation Method

Wood-frame windows perform best when the opening is measured, not guessed. Measure width at the top, middle, and bottom. Record the smallest number. Measure height on both sides and through the center, then use the shortest result. A 3/8-inch difference can affect shimming and operation. Check the diagonals too. If they differ noticeably, the opening may be out of square. Do not force the window to fit. That creates stress in the frame.

Before ordering, identify the wall condition and the existing frame. A replacement installation may preserve interior trim, while a full-frame installation exposes the rough opening. Full-frame work usually allows better inspection of flashing, insulation, and concealed damage. It also requires more finishing time. For older homes, inspect the sill with a screwdriver and look for soft wood. Moisture stains deserve attention, even when the surface feels firm. Sometimes the simple-looking option is not the safer one.

Use the manufacturer’s rough-opening requirements, local building rules, and advice from a qualified installer. Leave the specified clearance for shims; a tight fit is not a precise fit. Confirm sill slope, drainage, and head flashing before sealing the perimeter. Follow the installation sequence carefully, because sealant cannot correct poor water management. I have seen beautifully aligned windows leak after one skipped flashing step. Recheck measurements before cutting or ordering. It takes minutes. Replacing a misordered window takes much longer.

Compare NFRC U-Factor, SHGC, VT, and Air-Leakage Ratings

7 Tips for Buying Wood Frame Windows

Compare NFRC U-Factor, SHGC, VT, and Air-Leakage Ratings

A wood frame window can feel warm and traditional, but its label reveals more than appearance. Look for an NFRC-certified label before comparing models. The U-factor measures heat transfer through the complete window. Lower numbers usually mean better insulation, especially during cold winters. Compare similar sizes and glazing packages, or the numbers may mislead you.

SHGC shows how much solar heat enters through the glass. A higher rating may help a shaded, cold-climate room, while a lower rating can reduce summer overheating. Orientation matters. South- and west-facing windows often receive stronger sunlight. VT, or visible transmittance, measures daylight passage. Higher VT can brighten a hallway, but excessive glass may create glare near a desk or television.

Air-leakage ratings indicate how much air passes through a closed, tested window. Lower is better. Small differences become noticeable beside a windy bedroom or poorly sealed trim. Read the whole label. Installation still matters. An excellent window can perform poorly when the opening is damp, warped, or loosely foamed. I would not choose a window from one number alone. That shortcut is tempting, but incomplete. Check the warranty, installation details, condensation guidance, and local climate needs. The perfect rating on paper may not suit a shaded wall, a humid room, or an older wood opening.

Evaluate Wood Species, Cladding, Glazing, and Finish Durability

7 Tips for Buying Wood Frame Windows

Wood species affects stability, decay resistance, and maintenance. The USDA Forest Products Laboratory’s Wood Handbook, FPL-GTR-282, explains that moisture movement varies by species and grain direction. In practice, I inspect end grain, joints, and sill details before admiring the finish. Dense wood is not automatically better. A poorly sealed sill can still absorb water. Pine may suit protected elevations, while naturally durable species can perform better in exposed conditions.

Cladding deserves close attention. Aluminum or composite exteriors reduce repainting, but they do not eliminate drainage concerns. Check weep paths, corner joints, and the seal between cladding and wood. The WDMA Hallmark Certification program emphasizes product performance, installation quality, and water management. That matters more than a glossy sample. I have seen attractive windows fail around unsealed trim.

Glazing controls comfort and energy use. The U.S. Department of Energy estimates windows can represent 25–30% of residential heating and cooling energy use. Compare U-factor, solar heat gain coefficient, visible transmittance, and air leakage ratings from NFRC-certified labels. Low-emissivity glass helps, but the best specification depends on climate and orientation. South-facing glass may need lower solar gain; north-facing glass may benefit from stronger insulation. Finish durability also needs evidence. Ask for accelerated-weathering results, coating warranties, and maintenance instructions. Warranties are useful, but they are not field evidence. I would still request installed references from similar exposure.

7 Tips for Buying Wood Frame Windows - Evaluate Wood Species, Cladding, Glazing, and Finish Durability

Tip What to Evaluate Relevant Facts Durability or Performance Impact Buyer Checklist
1. Choose a suitable wood species Review the species, grain, density, moisture resistance, and availability of replacement components. Common window woods include pine, fir, spruce, cedar, oak, and other hardwoods. Softwoods are generally lighter and easier to machine, while many hardwoods are denser and more resistant to surface wear. Species alone does not determine service life. Proper detailing, moisture control, finishing, and maintenance are essential for every wood type. Ask for the wood species, moisture content at manufacturing, finger-jointed or solid construction details, and documentation for preservative treatment if used.
2. Inspect moisture-management details Look for sloped sills, end-grain protection, drainage paths, drip edges, sealed joints, and properly designed flashing interfaces. Wood absorbs and releases moisture. Prolonged wetting can contribute to swelling, coating failure, fungal decay, and joint movement. A window that drains effectively and allows exposed surfaces to dry is less likely to experience rot or premature finish deterioration. Request installation drawings and verify that the sill, head flashing, side flashing, and surrounding wall drainage system work together.
3. Compare exterior cladding options Compare bare wood, aluminum-clad wood, fiberglass-clad wood, and other exterior protection systems. Cladding shields much of the exterior wood from ultraviolet exposure and direct weather. It does not eliminate the need for correct flashing, drainage, and periodic inspection. Clad exteriors typically reduce exterior painting requirements, while exposed wood provides a traditional appearance but needs more frequent coating maintenance. Check cladding coverage at corners, sills, joints, and operating components. Confirm how damaged cladding can be repaired and how water is drained behind it.
4. Select glazing for climate and comfort Evaluate the number of panes, low-emissivity coating, gas fill, spacer design, visible transmittance, and solar heat-gain coefficient. Double glazing generally insulates better than single glazing. Low-emissivity coatings reduce radiant heat transfer, while solar heat-gain requirements depend on orientation and climate. The glazing package strongly affects heat loss, interior surface temperature, condensation risk, daylight, and cooling loads. Compare whole-window U-factor and solar heat-gain coefficient rather than glass-only values. Confirm that performance ratings match the project’s climate and exposure.
5. Examine finish quality and coating system Check whether the finish is paint, stain, or a factory-applied coating, and inspect coverage on edges, joints, corners, and end grain. Coatings protect wood from ultraviolet radiation and moisture exchange. Dark colors generally absorb more solar heat than light colors and may require coating-system approval. Consistent coverage and sealed end grain help reduce cracking, peeling, swelling, and moisture entry. No finish removes the need for periodic inspection. Request the finish type, preparation method, number of coats, approved touch-up products, and recommended inspection or recoating interval.
6. Verify air and water performance Review tested air leakage, water penetration resistance, structural performance, and operating-force results for the complete window assembly. Air leakage is reported as a rate through the closed window. Water-resistance testing evaluates whether water enters under specified pressure and exposure conditions. Good air and water performance can improve comfort and help protect the frame and surrounding wall from moisture damage. Ask for independently tested performance data and verify that the tested size, configuration, and operating style match the units being purchased.
7. Plan maintenance and service access Assess cleaning access, hardware availability, seal replacement, glass-unit replacement, repainting needs, and warranty responsibilities. Maintenance commonly includes cleaning, inspecting joints and sealants, keeping drainage openings clear, lubricating hardware when specified, and repairing damaged coatings. Early repair of coating damage, failed sealants, or deteriorated weatherstripping can help prevent larger moisture and energy-performance problems. Obtain written care instructions, parts availability information, warranty exclusions, and a realistic long-term maintenance schedule before ordering.

Note: Window performance depends on the complete assembly, installation quality, building exposure, climate, and ongoing maintenance—not on wood species or glazing selection alone.

Check FGIA Performance Grades, Warranties, and Life-Cycle Costs

Wood frame windows can look warm and traditional, but performance deserves equal attention. Tip 1: Check the FGIA AAMA/WDMA/CSA 101/I.S.2/A440 performance grade. It evaluates air leakage, water resistance, and structural strength. Tip 2: Match the grade to your climate and building height. A coastal home needs different protection than a sheltered inland house. Higher is not automatically better.

Tip 3: Request the complete test report, not only a sales label. Look for U-factor, solar heat gain coefficient, visible transmittance, and air-leakage values. The U.S. Department of Energy reports that windows can account for 25–30% of residential heating and cooling energy use. Small rating differences can matter. Tip 4: Study the warranty language. Check coverage for glass, finishes, hardware, installation, and labor. Ask what happens if moisture appears inside the frame. Many warranties sound broad, then narrow quickly.

Tip 5: Calculate life-cycle cost, including repainting, sealing, repairs, heating, and cooling. Tip 6: Compare expected service life with replacement intervals. A lower purchase price may become expensive after repeated maintenance. Tip 7: Inspect installation details. Even an excellent window can leak through an unsealed sill or poorly flashed opening. FGIA guidance emphasizes proper installation and field performance, yet real sites are rarely perfect. I would photograph each opening before closing the wall. That habit catches mistakes early. DOE data supports energy analysis, but actual savings still depend on orientation, shading, ventilation, and workmanship.

Wood Frame Window Buying Guide: FGIA Performance Classes

Minimum design pressure rises from R to AW under the FGIA/AAMA window performance classification system. Higher classes generally indicate greater tested resistance to wind loads, but the correct class depends on the building location, height, exposure, and local code requirements.

When comparing wood frame windows, confirm the tested performance class and design pressure, then review the written warranty for coverage period, exclusions, glass and finish terms, and transferability. Compare life-cycle cost—not only purchase price—by considering installation, maintenance, energy use, repairs, and expected service life.